

WordPressテーマ『SWELL』を使った素敵なサイト、ブログを集めました!! | SWELL DESIGN GALLERY by WebNote+
2024年4月にリニューアルしました!絞り込み検索やお気に入り機能もあります。ぜひ見ていってください!
WordPressテーマ『SWELL』を使った素敵なサイト、ブログを集めました!! | SWELL DESIGN GALLERY by WebNote+
2024年4月にリニューアルしました!絞り込み検索やお気に入り機能もあります。ぜひ見ていってください!


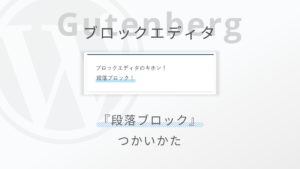
ブロックエディターを使う上で、欠かすことのできない存在が『段落ブロック』です。
ブロックエディターで文章を入力するときは、段落ブロックを使います。
また、段落ブロックと他のブロックを組み合わせて使う場面も多々あります。
WordPress標準の段落ブロックでは、文字色やサイズの変更など必要最低限の装飾だけができるようになっています。
例えば、マーカー(蛍光ペン)の様な装飾はWordPress標準の機能ではできません。
ですが、WordPressテーマやプラグインによっては、マーカー機能を追加してくれているものもあります。
その他にもテーマ固有の段落ブロックの装飾スタイルもあります。
そこでこの記事では、WordPress標準の段落ブロックの使い方と合わせて、テーマごとの段落ブロックの機能や装飾の違いもご紹介します。
 さとしん
さとしんテーマ選びの1つの基準にもなるかと思うので、ぜひ見てみてください…!
WordPressブロックエディターの使い方をまとめたガイドを作りました。

段落ブロックは、ブロックエディターを使う上で1番最初に覚える必要があるブロックです。
文章の入力には段落ブロックを使います。
また、他のブロックと組み合わせて段落ブロックを使う場面も数多く発生します。
例えば、下の例は画像ブロックと段落ブロックを組み合わせた例です。

そしてこちらは、ボタンブロックと段落ブロックを組み合わせた例です。

どちらも良く見るレイアウトだと思います。
このように、段落ブロックには文章を入力する以外の役割もあります。
なので、段落ブロックはブロックエディターを使う上で1番最初に覚える必要のあるブロックと言えます。
さとしん使い方はとっても簡単なのでご安心を…!
では、早速ブロックエディター、段落ブロックの使い方を解説していきます。
使い方といっても、基本的には「文章を入力→Enter→文章を入力→Enter」を繰り返すだけでOKです。
さとしんWordやメールと同じ様なイメージです。とても簡単ですね…!
上記が基本的な使い方ですが、段落ブロックは複数の方法で配置することができます。
「文章を入力、または / でブロックを選択」の部分を選択して、文字を入力することができます。
 さとしん
さとしんこの方法が1番簡単です…!
メインコンテンツエリアで「+」ボタンをクリックして、「段落」ブロックを選択
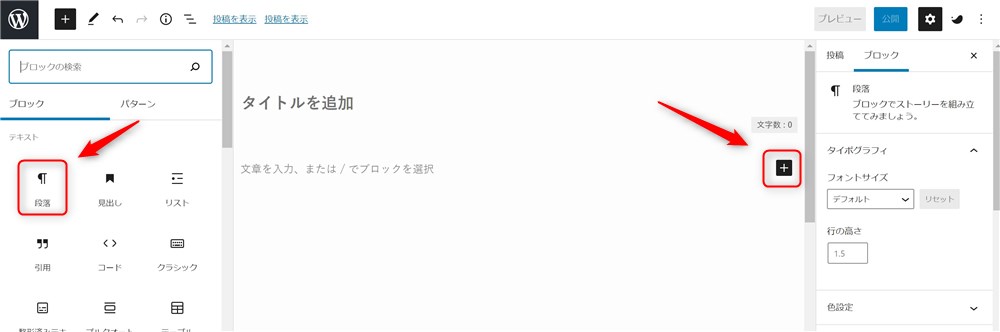
選択した後は、①と同じように「文章を入力、または / でブロックを選択」の部分に文字を入力していきましょう。
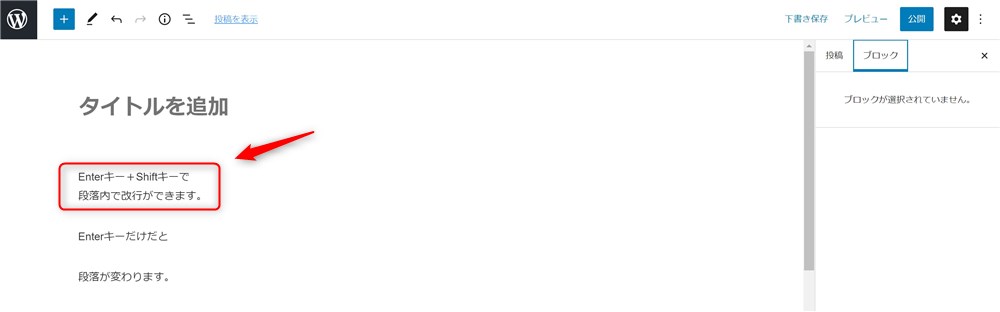
それから、Enterキーを押すと、下に段落ブロックが追加されます。
なので、基本的にはMicrosoftのWordなどの様に、文字を入力してEnterで段落を変えるイメージでどんどん文字を入力していけばOKです。
また、段落内で改行をしたい場合はShiftとEnterキーを同時押しです。
 さとしん
さとしん改行も覚えておきましょう…!
文字を入力した段落ブロックを選択した状態で、ブロックの上部に表示されるブロックツールバーやサイドバーから様々な装飾や設定ができます。
それぞれ説明していきます。
ブロックツールバーの「B」をクリックすると太字になります。
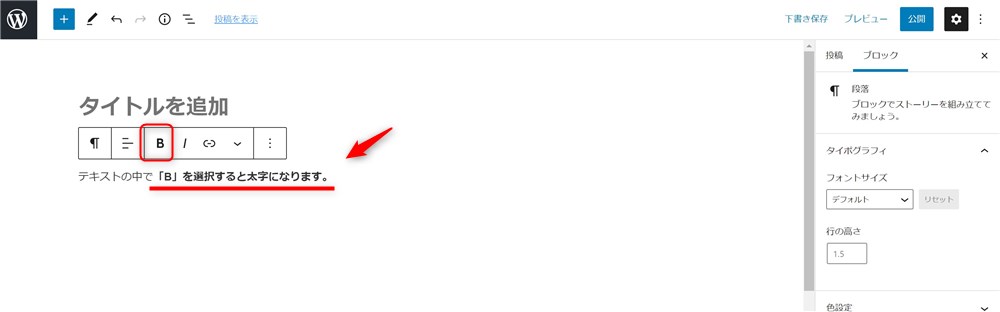
ブロック全体を選択して「B」をクリックすると、段落全体を太字にできます。
ブロック内の特定の文字列だけを選択することで指定部だけ太字にすることも可能です。
また、ツールバーの「I」をクリックするとイタリックの設定が可能です。
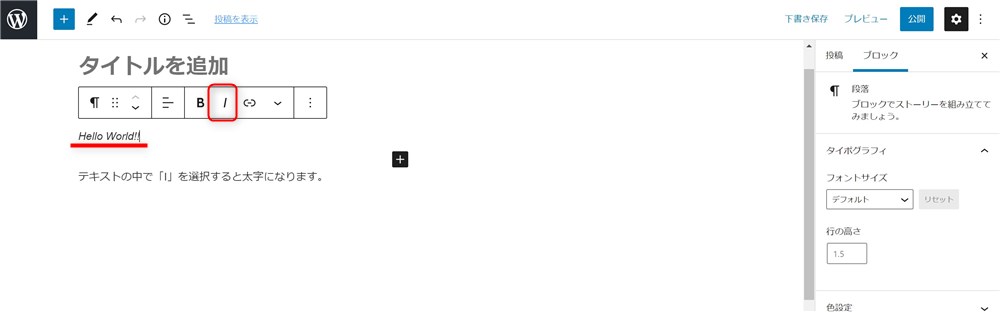
太字同様に、ブロック全体、指定部のみ、どちらの設定も可能です。
以下の手順で段落ブロック内にリンクを挿入することができます。
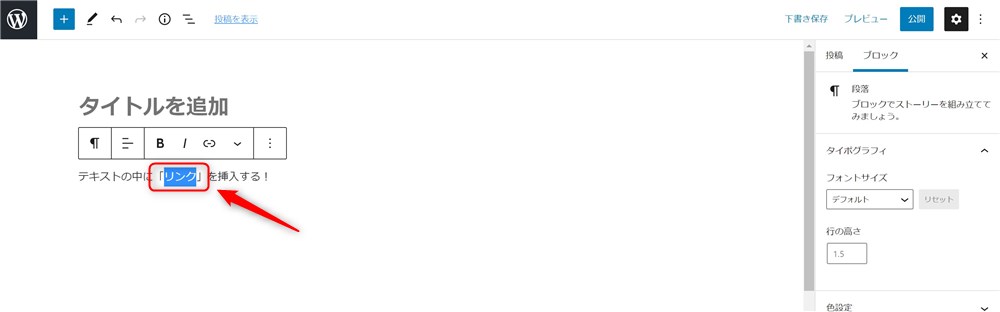
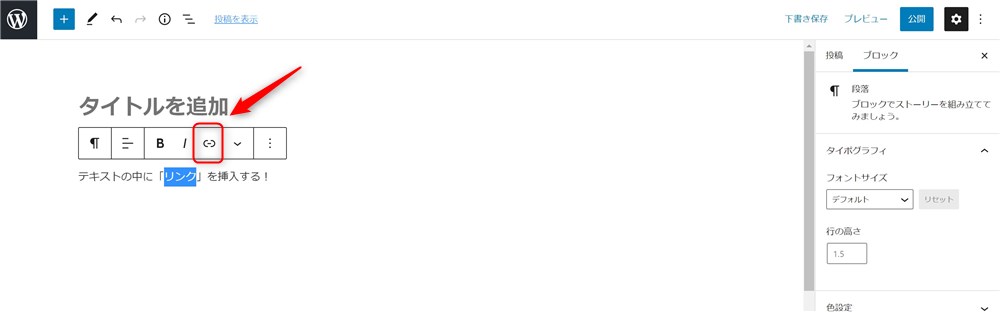
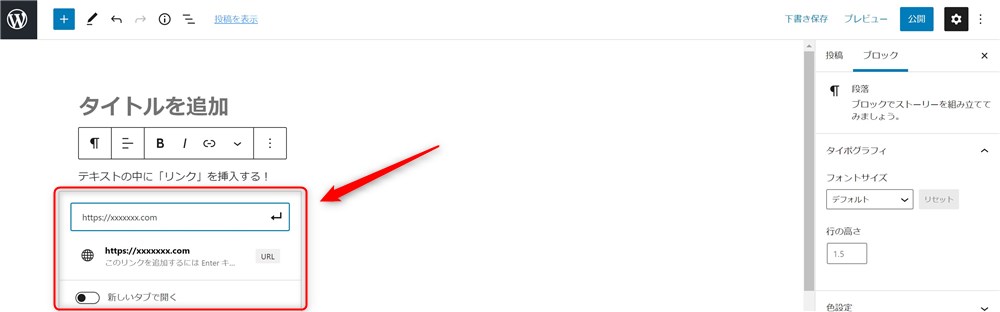
リンクを新しいタブで開く場合は「新しいタブで開く」をクリック
上記の方法でリンクを設定することができます。
同じサイト内のリンク(内部リンク)を貼る場合、URL入力欄にページタイトルを入力することでもリンクを貼ることができます。
さとしんURLをコピペするよりも簡単です…!
段落ブロックを選択した状態で、サイドバーからも色々な設定ができます。
サイドバーの「テキスト設定」では以下のような設定ができます。
文字サイズはその名の通り、文字のサイズを変更することができます。
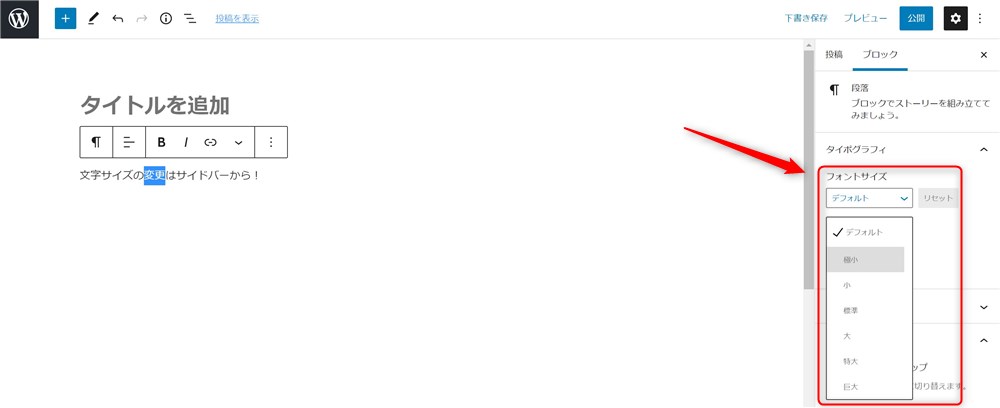
サイズを変更したい文字を選択して、お好みの文字サイズを選択するだけでOKです。
使用するテーマによって、選択できるフォントサイズが違うので注意しましょう。
ドロップキャップは文字の先頭の文字を大きく表示することが出来る機能です。
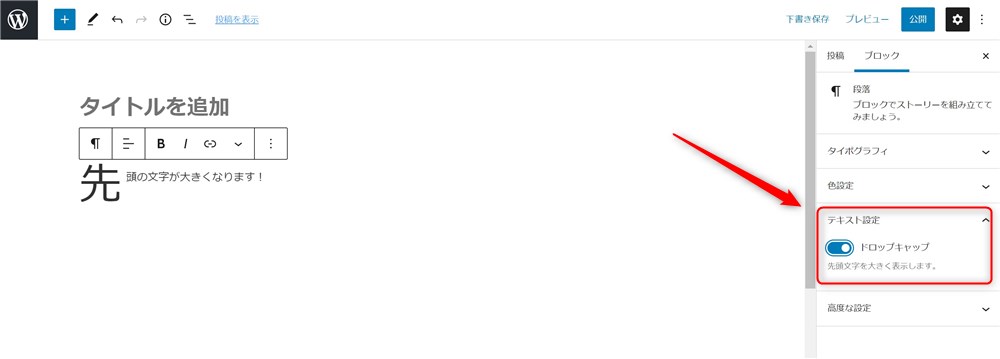 さとしん
さとしん目立たせたい場所などでつかうと効果的かもしれません…!
サイドバーの「色設定」では、文字色やブロックの背景色を変更できます。
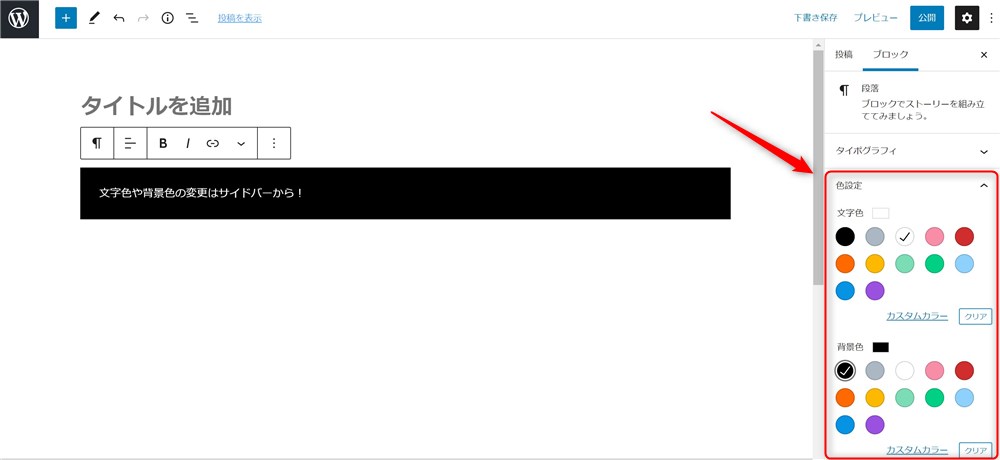
お好みの色を選択するか、カラーコードを入力することで変更可能です。
また、文字色と背景色の組み合わせが悪く、見えにくい配色になってしまった場合、WordPress側で注意喚起をしてくれます。
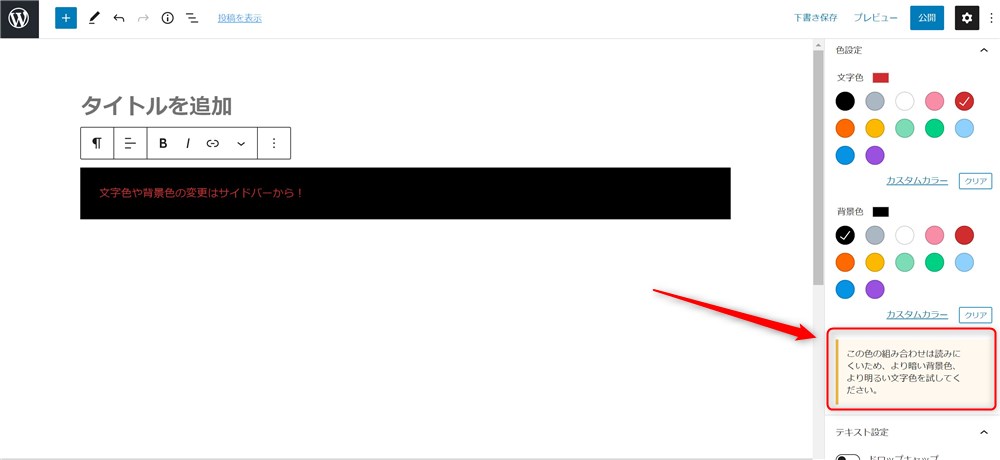
見やすさは大切なので、警告文が表示されたら違う色の組み合わせを試してみましょう。
さとしんブロックエディターの親切な機能です…!
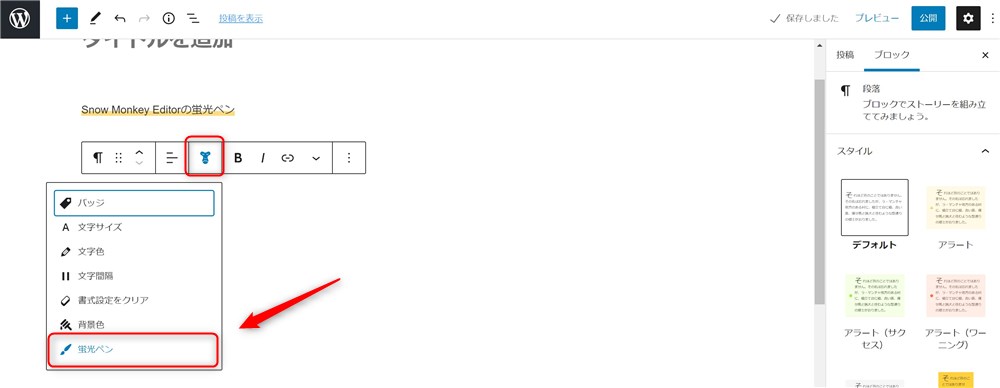
WordPressの標準の仕様では、文字にマーカー線(蛍光ペン)を引く装飾はできません。
もし、マーカーを引く装飾がしたい場合は、マーカー機能を搭載したテーマやプラグインを導入する必要があります。
例えばプラグインでは「Snow Monkey Editor」などがあります。
このプラグインは、WordPressテーマ「Snow Monkey」の関連プラグインですが、Snow Monkey以外のテーマでも使用できる素晴らしいプラグインです。
このあと、改めてご紹介します。
WordPress本体側で用意されている段落ブロックですが、WordPressテーマによって様々な装飾デザインが追加されたり、機能を増やすことができます。
今回は、100%GPLの2つのWordPressテーマや関連プラグインの段落ブロックの機能をご紹介します。
さとしんどのテーマもワンクリックでデザインを追加できます…!
 』公式サイト
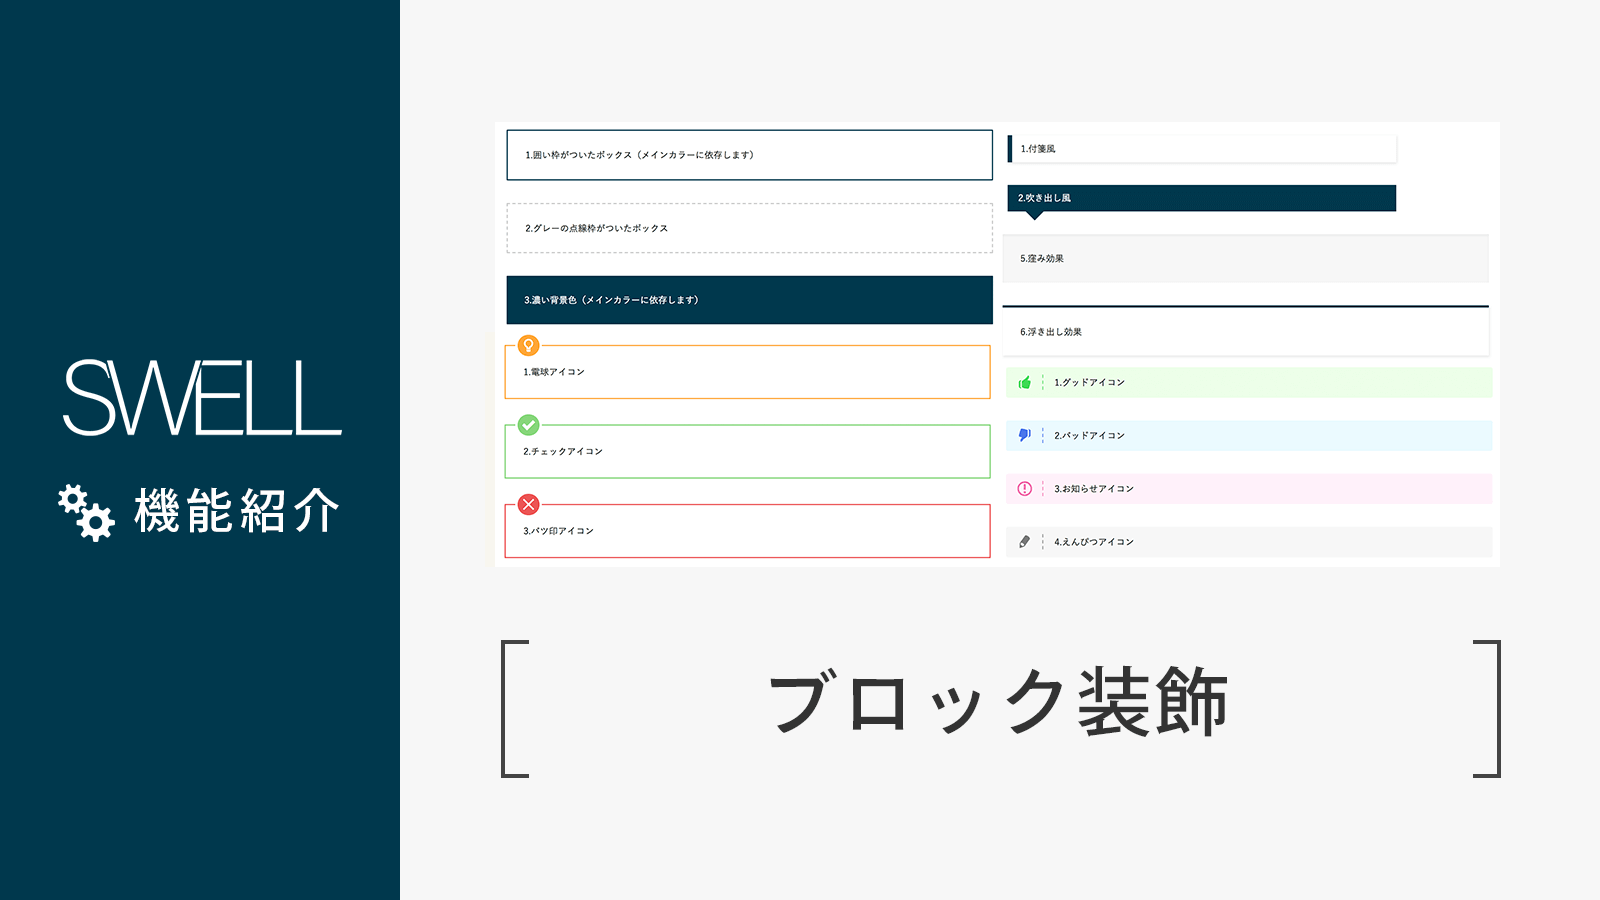
ブロックエディター完全対応のWordPressテーマ『SWELL![]() 』では、追加のプラグインなど不要で、テーマを適用するだけで段落ブロックの機能が拡張されます。
』では、追加のプラグインなど不要で、テーマを適用するだけで段落ブロックの機能が拡張されます。
さとしんSWELLの段落ブロックは装飾が豊富でおしゃれです…!
まず、SWELLの段落ブロックでは以下の様なスタイルが設定できます。
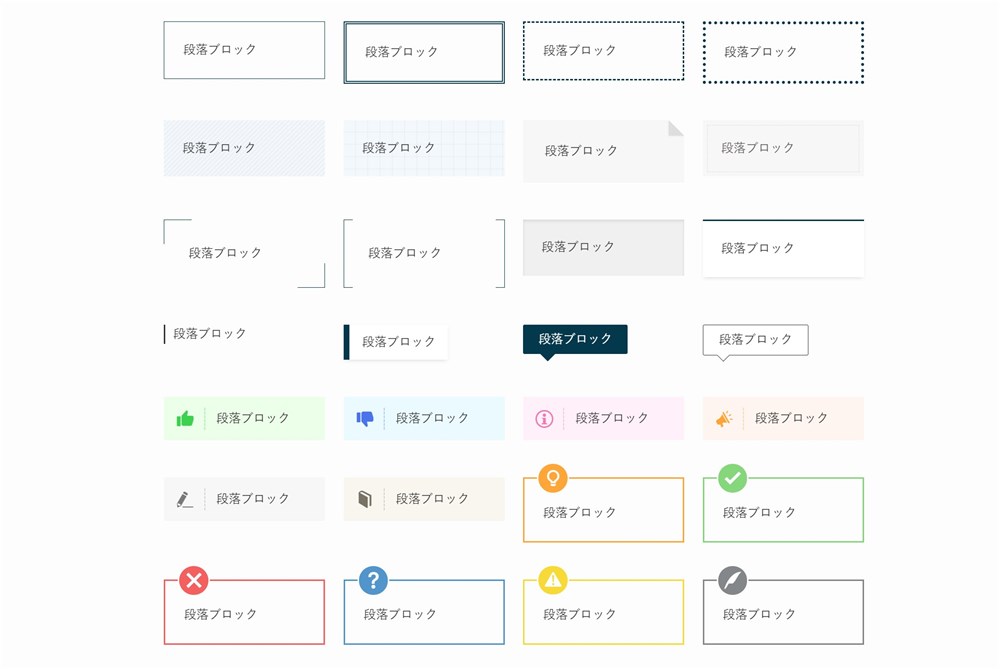
どの装飾もサイドバーからワンクリックで設定できます。
そしてさらに、一部のボックス装飾は管理画面から、スタイルのパターンを設定できます。
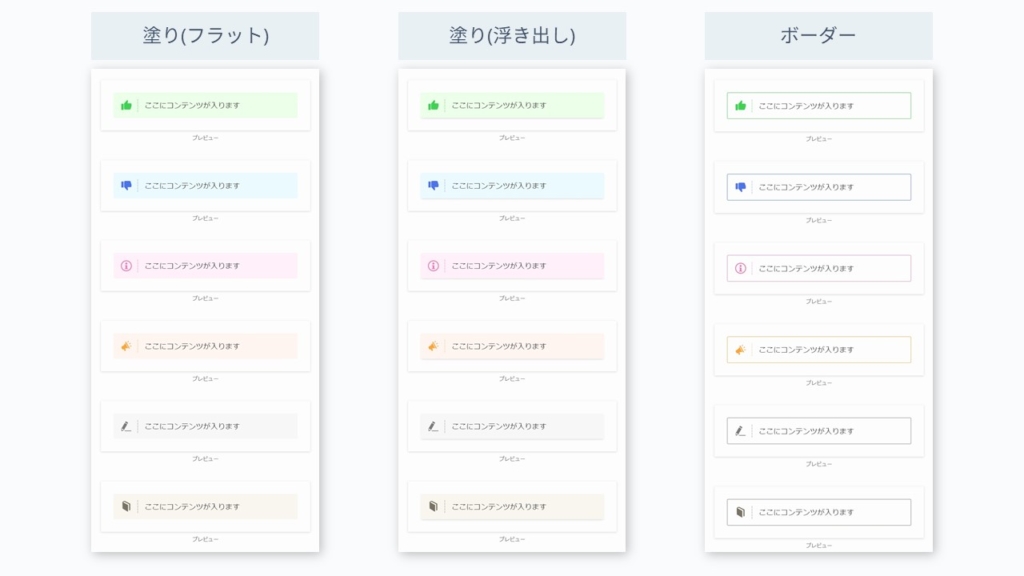
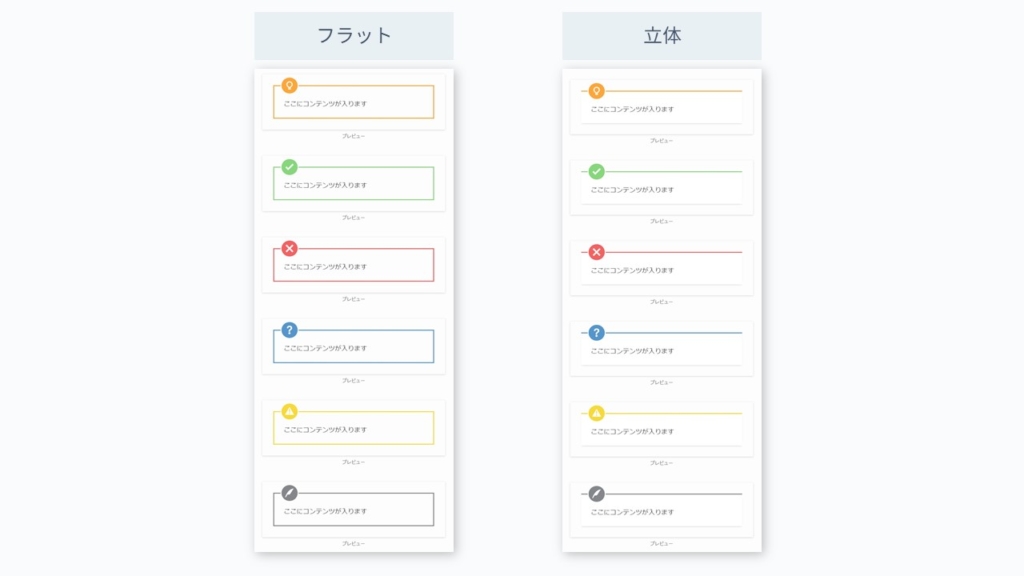
これらの装飾は、公式サイトで「ボックス装飾」と表現されており、ボックス装飾はグループブロックにも適用可能です。
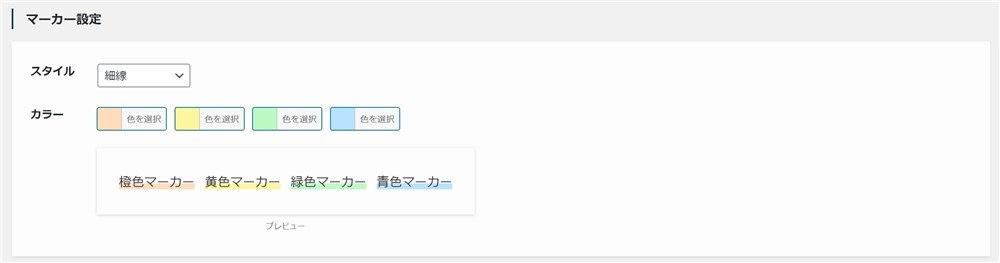
ちなみに、マーカー線も複数のデザインパターンが用意されています。
僕はこのブログでも使用している「ストライプ」のスタイルがお気に入りです。
 さとしん
さとしんSWELLはデザイン面も優れているので、ブロガーさんにも大人気です…!
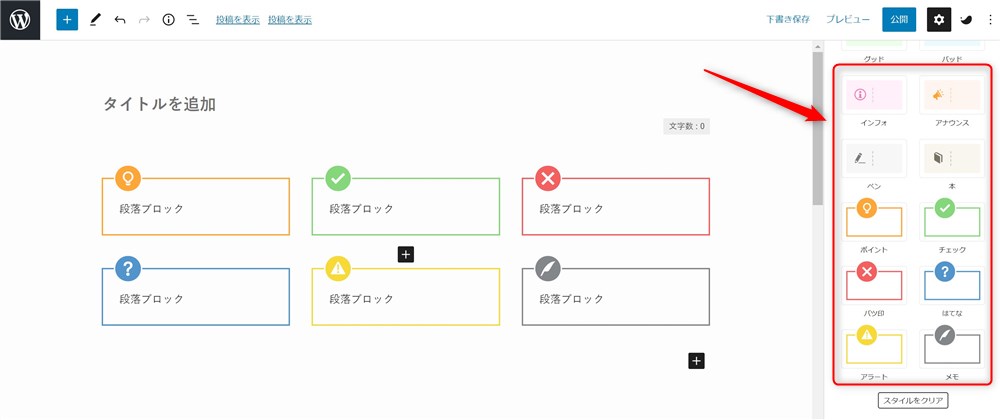
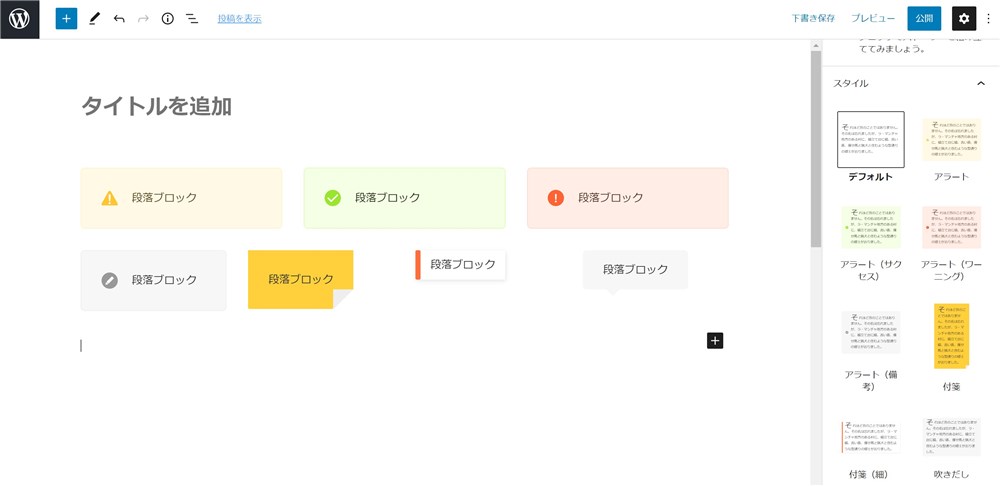
WordPressテーマ『Snow Monkey』の関連プラグイン『Snow Monkey Editor』もリストブロックの機能を拡張してくれます。
『Snow Monkey Editor』は無料でインストールできて、Snow Monkey以外のテーマでも使用可能です。
『Snow Monkey Editor』では、以下のようなスタイルを設定できます。
 さとしん
さとしんシンプルなアラート系のスタイルがとても好みです…!
もちろん、マーカー線(蛍光ペン)も引くことができます。
ブロックエディターの基本中の基本、「段落ブロック」についてご紹介しました。
段落ブロックといっても、難しく考える必要はなく、文章を入力したらまた新しい段落ブロックに文章を入力するという流れを繰り返すだけです。
また、いろいろなブロックと組み合わせることで、より魅力的な表現ができるようになります。
ぜひ、段落ブロックといろいろなブロックの組み合わせを試してみてください。
また、対応するテーマやプラグインを使用すると、段落ブロックの装飾やマーカー線などの機能が追加されます。
今回は以下の2つのテーマと関連のプラグインをご紹介しました。
WordPress標準の段落ブロックでは少し物足りないと感じる場合は、今回紹介したテーマやプラグインの導入もぜひ検討してみてください。
ブロックの細かい機能ひとつひとつもテーマ選びの判断材料になると思っています。
ブロックエディターで楽しくコンテンツを作っていきましょう。
最後まで読んでいただきありがとうございました!
ブロックエディターの関連記事
ブロックエディターの使い方完全ガイド↓↓